
Ahh to those days by the Jersey Shore, Day Camp Arts & Crafts and Amusement Parks.
PencilPixels brings you Sand Art Layer Styles for Photoshop.
As simple as making a shape and selecting one of the 8 styles.
This blog will
Show some examples.
Explore some options for using it creatively.
Show how to modify the Style.
Provide some resources for Photoshop shapes used in this blog.
 |
|
There are 8 styles in this set which include multi-color and single color sand patterns. Included is a Cork style, to cap off your container. There is also a 'no styles' style. |
So all you need is to get started is to layout some type or to select a shape from the shapes pallet.

Then select that layer and click on a style from the Photoshop Styles pallet.


Shapes and Text are just some of the objects that you can apply this style to. Shapes, if you think about it, are nothing more than silhouettes. If you have a backlit image, just select the black portion of the image, copy and paste it. You then can apply the Sand Art style to that new layer.

With a little eraser work on the layer with the style, you can make the Sand Art 'container' appear not quite full to the top.
Experimenting with the values of the style is the best way to get unique looks. As a start point, fill a shape with with the first Sand Art Style in the set. Lets explore the style and how to change it's appearance. Once the style has been applied, double click in the layer to display the styles options pallet.
You can change the color TONE, by selecting the 'Color Overlay' option and then by selecting the over all color you want. Select 'Color' from the Blend Mode dropdown, and use an opacity less than 80%. This will change the coloration of the 'sand' pattern to that color. It adjusts the color balance of the pattern. In other words, it will retain some of the original colors of the pattern but also saturate the pattern with your selected color.


Also, as with all styles that use patterns, when the 'Pattern Overlay' is selected you can drag your cursor over the image and shift the pattern's center point. This is useful with a large pattern like Sand Art so that you can offset the position the pattern and change where it begins in your shape.
Here are some examples of the styles supplied in the download that use the above variations.

The 9th style, supplied with the set, is a Cork style. I usually draw a rounded corner rectangle on the layer above the sand art, apply the 'Cork' style, and position the rectangle just above the top of the graphic.


Start with good art and get better results. Here are some Free Photoshop Shape sets from artists that are well worth a look at.
sarthony 45 Hearts http://sarthony.deviantart.com/gallery/35297913?offset=24
hfs991hfs Hero Shapes http://hfs991hfs.deviantart.com/art/Hero-Shapes-82286081

Joeadonis More Ladies http://joeadonis.deviantart.com/art/More-Ladies-49811862
richardperkins Assorted_Logos http://richardperkins.deviantart.com/art/Assorted-Logos-91198824
hebedesign Skater Collection http://hebedesign.deviantart.com/art/Skater-Collection-28880909
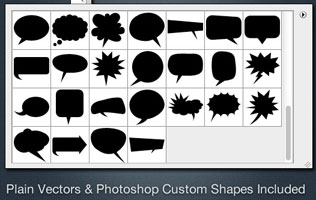
Medialoot Stiched Speech bubbles http://medialoot.com/item/stitched-vector-speech-bubbles/
Pencil Pixels